 |
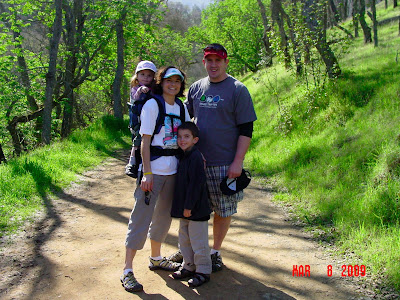
At 2 1/2 my daughter still got a ride!
Now she is 6 and carries her own pack! |
I have hiked for over 2 decades, so I sometimes forget that many people don't know where to start. I am passionate about getting out, and want to help others get out, too. This post is for you who want to start hiking, and need to know the basics.
So, hiking is just walking, right? Yes and no. If you can walk, you can hike. There are easy trails and moderate trails and advanced trails. Depending on your current physical condition, you may start right off onto a moderate or advanced trail, or you may need to stick to easy trails for awhile. You just need a few supplies and some planning know-how. This article will address supplies and some general hiking information. Stay tuned in the future for part 2, planning your own trip.
1. Go with another hiker, one who has some experience, for your first few times out. Even better is to join up with a group. Group meet-ups run by locals and hikes through a local gear shop are even better. No matter what, always let someone at home know where you are going and when you are expected to return.
2. You will want a small day pack to carry some gear in. There are all kinds of packs for sale with different features - make sure it is comfortable. Your first few times out you may just grab your kid's school backpack, and this may work out ok on an easy hike if your pack is light. But eventually you will want a more comfortable pack that has waist and chest straps to help the pack sit nicely on your back.
3. What do you need to put in your backpack?
- Water - 2 liters for an easy to moderate hike in normal weather. Carry more if it is really hot, and when you start doing longer, harder hikes. Carry your water in a lightweight plastic container. It is perfectly ok to just reuse a Gatorade-type plastic bottle. Do not just bend down and gulp fresh water out of that mountain stream - it can make you sick. There can be a parasite called giardia in the water that will give you flu-like symptoms. You can carry water treatment tablets with you, iodine-based or chlorine-based. They are tiny, light-weight, and not too expensive.
- Food - I like to snack as I am hiking; it helps to keep my energy up. I take foods I normally have at home, such as nuts, dried fruits, sturdy crackers, cheese, tuna pouches, bagels & peanut butter. I also like to get beef jerky, Jelly Bellies, granola bars, and fruit leathers. It is great to pack a sandwich, but leave off the mayo of course, and maybe make it on a bagel or pita, as regular sandwich bread tends to smash into a mess.
- Extra clothing (more about what to wear ON YOU below) Socks (quick-dry or wool), a wind breaker or rain coat depending on conditions to where you are headed, and a knit hat & gloves. It is better to have these and not need them than to need them and not have them.
- Sunscreen & Mosquito Repellant - essential for protecting your skin
- Flashlight - Carry a small, light one. A headlamp is ideal for leaving your hands free.
- Lighter/water proof matches/dryer lint - Why, you ask? If you are out overnight because of getting lost or due to some other problem, you may need heat to keep warm. Stick it in a small zip-lock.
- Toilet Paper/Wipes Packets - Put them into a ziplock, too, and you will be glad you have them when nature calls. Put extra ziplocks into there - you need to pack out your toilet paper. Yes, you read correctly. In some areas it is required, but always recommended for leaving no trace of our presence out in wild areas. If you have to do number 2, dig a hole at least 6 inches deep and
- Camera - Capture the impressive scenery & record those memories
4. Clothing - Do not wear cotton clothing or jeans - you may be able to get away with it if you are hiking in warm weather and not near any water and no rain is expected. The problem with cotton is that once it gets wet, caused by sweating, stepping through a creek or from rain, etc., it stays wet and gets really heavy on you and then does not keep you warm at all.
Instead, choose quick-drying fabrics like nylon, polyester, etc. Wearing pants is a good idea - it will protect your legs from abrasions and also from sun. In warm weather, wear short sleeves, in cooler weather wear long sleeves. Always carry another layer, like a fleece. Again, avoid your department store cotton hoodie. Checking conditions for where you're headed can help you decide if you need a wind-breaker or rain-coat along. We live here in the west, so you're likely going to the Sierras, or Yosemite. When you are in these mountains, the weather can be unpredictable, often changing from sunny to thunderstorms very quickly. And for shoes, you probably have a pair of already broken-in "tennis" shoes that will be fine. You do not need boots. After you get more into hiking you may want fancier shoes, such as water proof or more traction, etc.
What to wear on you:
- sunglasses
- sun hat (like a baseball cap or hat with a brim all the way around)
- short or long sleeve non-cotton top
- pants, non-cotton
- quick-dry or wool socks
- comfortable close-toed shoes
- don't forget to put the extra layers/hat/gloves inside your pack
5. Trail Etiquette - For day-hiking purposes, even as a beginner, you will want to practice these three principles of Leave No Trace: Respect Wildlife, Dispose of Waste Properly, and Be Considerate of Others. Pack out ALL your garbage, just stick it in a ziplock in your backpack & throw it away in a garbage can back at the car, or at home. Do not feed or approach animals, even little ones like squirrels or birds. They can get sick from people-food, and they could bite you. Don't be loud or play music out loud. As you hike more, you may want to learn about Leave No Trace Principles.
6. Take it Easy - Even if you have been going to the gym or doing some walking around the neighborhood, you may get tired quicker than you think while hiking, especially if your are up in a high elevation. Hiking is rarely completely flat, and the ups and downs and maybe some rock-hopping can tire out your legs. (If you can borrow trekking poles it can really help save your legs on the down-hills.) Use the first part of the hike as a "warm-up", maybe even do some light stretching at first. Eat and drink frequently, and rest when needed. Don't worry about the pace of others; I've been in lots of group hikes where some people don't go the whole way - they just find a beautiful spot to sit and read or relax and wait for the others to come back by.
 |
| A group I've hiked with - we were hiking to Mt. Hoffman in Yosemite |
It may seem like a lot at first, and it may help to write/type up a list to use as you set your things out a day or so before your hike. It also helps to keep your gear and clothing for hiking together, in a certain drawer or even in a plastic tub. Then it is ready each time and you are less likely to forget things or be looking around for your gear. The easier and quicker it is to get ready, the more likely you can get out more often! And let's face it, those of us who love hiking hike because it is fun!
copyright Nicole Cipriano. All rights reserved.
Please do not copy or repost any content or photos.
Instead, please post the link to the Blog.


